Crock Pot White Chicken Chili
1 1/2 lb. Boneless, skinless chicken breast (I used 2 large)
2 Cans Canellini Beans
1 Bag Shoepeg Corn (frozen)
2 Tbsp. Minced Onion
3 tsp. Cumin
3 tsp. Minced Garlic, (I used Tastefully Simple's Garlic, Garlic)
1/2 tsp. Oregano
32 Oz. Low Sodium Chicken Broth
Salt & Pepper to taste
DIRECTIONS: Add beans, chicken, broth and seasonings to crock pot. Cover and cook on low for 8-10 hours. Shred chicken and add corn. Continue cooking for approx. 1/2 hour or until corn is cooked. Serve with shredded cheese, sour cream and tortilla chips!
HAPPY EATING!
Tuesday, December 11, 2012
Saturday, December 8, 2012
Pepperoni Crescent Rolls
All you need is a can of crescent rolls, 4 cheesesticks and pepperoni slices!!

Roll them up -


Pepperoni Crescent Rolls
1 Tube of Crescent Rolls
Package of Pepperoni Rolls
4 Mozzarella Cheese Sticks
DIRECTIONS: Unroll crescents and separate into 8 triangles. Place desired amount of pepperoni slices on each crescent. Cut cheese sticks in half and place each half of cheese stick on the crescent. Roll up and back at 375 for approx. 12-15 minutes. Enjoy!!
Happy Eating!
Gingerbread Truffles!
OH. MY. WORD. These are such a great little treat! Last weekend I attended a Cookie Exchange (hosted by a fabulous friend), and these were a little treat that Ali made for us all to sample!!

I immediately made a mental note of what ingredients I had on hand and which ones I would need to be buying on my way home from the cookie exchange! I just can't even explain how wonderful these are - you should make some then you will know how good they are!
There are a lot of different gingerbread truffle recipes out there - here is how we made them!! It may seem like a lot of steps - but it really is easy to do!
Gingerbread Truffles (http://www.munchkinmunchies.com/2010/12/gingerbread-truffles.html)
- 1 cup white chocolate chips
- 3 tbsp light corn syrup
- 1/2 cup evaporated milk
- 1 tsp vanilla extract
- 1 tsp ground ginger
- 1/4 tsp cinnamon
- 1/8 tsp cloves
- 1/8 tsp nutmeg
- 1/2 tsp salt
- 1/2 cup powdered sugar
- 1 cup finely chopped nuts
- 2.5 cups gingersnap crumbs (from about 12 oz of cookies)
- 1/2 cup granulated sugar
Mix Liquid Ingredients with Melted Chocolate
Start by melting the white chocolate. Place the chips in a large microwave-safe bowl and microwave until they're melted, stirring after every 45 seconds to prevent overheating.
Once the white chocolate is melted, add the corn syrup, evaporated milk, and vanilla extract and stir gently to combine. If you have trouble mixing them, use a whisk to bring it all together. Whisk until the liquid ingredients are fully mixed into the white chocolate.
Add Dry Ingredients
Next add the gingersnap crumbs, powdered sugar, ginger, cinnamon, cloves, nutmeg, salt, and the chopped nuts. Stir until everything is evenly coated. It'll look pretty gloppy at this point.
Refrigerate Until Firm
Press a layer of cling wrap on top of the candy and refrigerate it until it's firm, at least 1 hour. When it's ready to roll it should be quite hard when you press down on it.
Form Candy Into Balls and Roll in Sugar
Use a teaspoon to form small balls, then roll the candy between your palms to make them round. Place the granulated sugar in a small bowl, and roll the balls in the sugar until they're coated. These are also excellent when rolled in cinnamon-sugar, or you could dip them in chocolate so they keep better at room temperature.
Serve Gingerbread Truffles
Keep your gingerbread truffles in the refrigerator, but let them warm up a bit before serving. These gingerbread truffles are a delicious alternative to traditional gingerbread cookies, and their spiced flavor really brings the holiday spirit.
HAPPY EATING!
Thursday, November 22, 2012
Happy Thanksgiving....

"Give thanks to the Lord, for he is good. His love endures forever." Psalm 136:1
We hope that you and your family had a Happy Thanksgiving! We are thankful for so many things at our house....being with family is one of them and Uncle Ryan coming home next week is among one of the TOP things for my kids!
Our day was great! Lunch at noon, followed by a hike/walk at Silver Mine Park and then back to the house for dessert and coffee!
Here is the appetizer we served at Thanksgiving! Easy enough that Riley actually did all the decorating of the Turkey (Cheeseball)!! I love that she is enjoying being in the kitchen!

2 (8oz) Blocks of cream cheese
1/4 lb. Sliced deli ham, finely diced
4 Green onions, sliced
2 tsp. Onion Powder
2 tsp. Garlic Powder
1 tsp. Worcestershire Sauce
1 Slim Jim
Pecans & Almonds
Assorted Pretzel Sticks
DIRECTIONS: Combine cream cheese with ham, onion and seasonings. Chill overnight. Bend slim jim at one end and place a clip on it. Let sit overnight. Roll cream cheese mix into a ball shape and roll in pecans and almonds. Place on serving plate. Add pretzels. Place slim jim in cheeseball. Decorate as desired. (We used a little cream cheese tinted with food coloring for eyes and beak. The red waddle is actually spaghetti that was soaked in red food coloring overnight).

The dessert table ~ need I say more? Pecan pie, pumpkin pie and a pumpkin Charlotte, all served with ice cream and coffee!
HAPPY EATING!
Monday, October 29, 2012
Overnight Pumpkin French Toast Bake!

Sandy is still coming - when I woke up this morning and looked outside I have to admit - this is it, this is just rain - my kids are missing school for rain?? However, Al Roker has promised that it is going to get worse as the day goes on! I also have to admit that I wish we were getting the blizzard that the mountain regions of NC are getting....I mean really, I can at least send the kid out in the snow when they start bouncing off the walls - which has started and it's only 10AM! Looks like it is going to be a board game/card game/craft making kind of day!
There is something about being housebound that makes me want to cook and bake! I mixed this up last night and thought how nice it would be to have a leisurely breakfast this morning - one that does not involve me repeating myself 25 times with, "Hurry up and eat your cereal the bus is coming down the road....".

(recipe from: Minimalist Baker)
1 Loaf Pepperidge Farms Brown Sugar Cinnamon Bread
7 Large Eggs
2 Cups Milk (any kind, I used 1%)
1 tsp. Vanilla
1 1/2 tsp. Pumpkin Pie Spice
1/4 C. Pumpkin Butter (or pumpkin puree*)
4 Tbsp. Brown Sugar (for topping)
Pecans (optional)
DIRECTIONS: Cut bread into 1" cubes and spread into a lightly greased 9x13 baking dish. In large bowl, whisk together eggs, milk vanilla and pumpkin butter until well combined. Pour over bread and bush down with a spoon until it is soaked into the bread. Cover and refrigerate overnight. Next morning - pull pan out of refigerator. Preheat oven to 350. While oven is preheating - sprinkle brown sugar over the top of dish and top with nuts. Bake for 45 minutes. Serve!
* If using pumpkin puree (canned pumpkin) you may need to compensate the flavor by adding more puree and pumpkin pie spice. (Pumpkin Butter is a lot more concentrated in flavor. I found my pumpkin butter at Stauffers of Kissel Hill - Rohrerstown).
HAPPY EATING!
Sunday, October 28, 2012
Pumpkin Pie Granola!
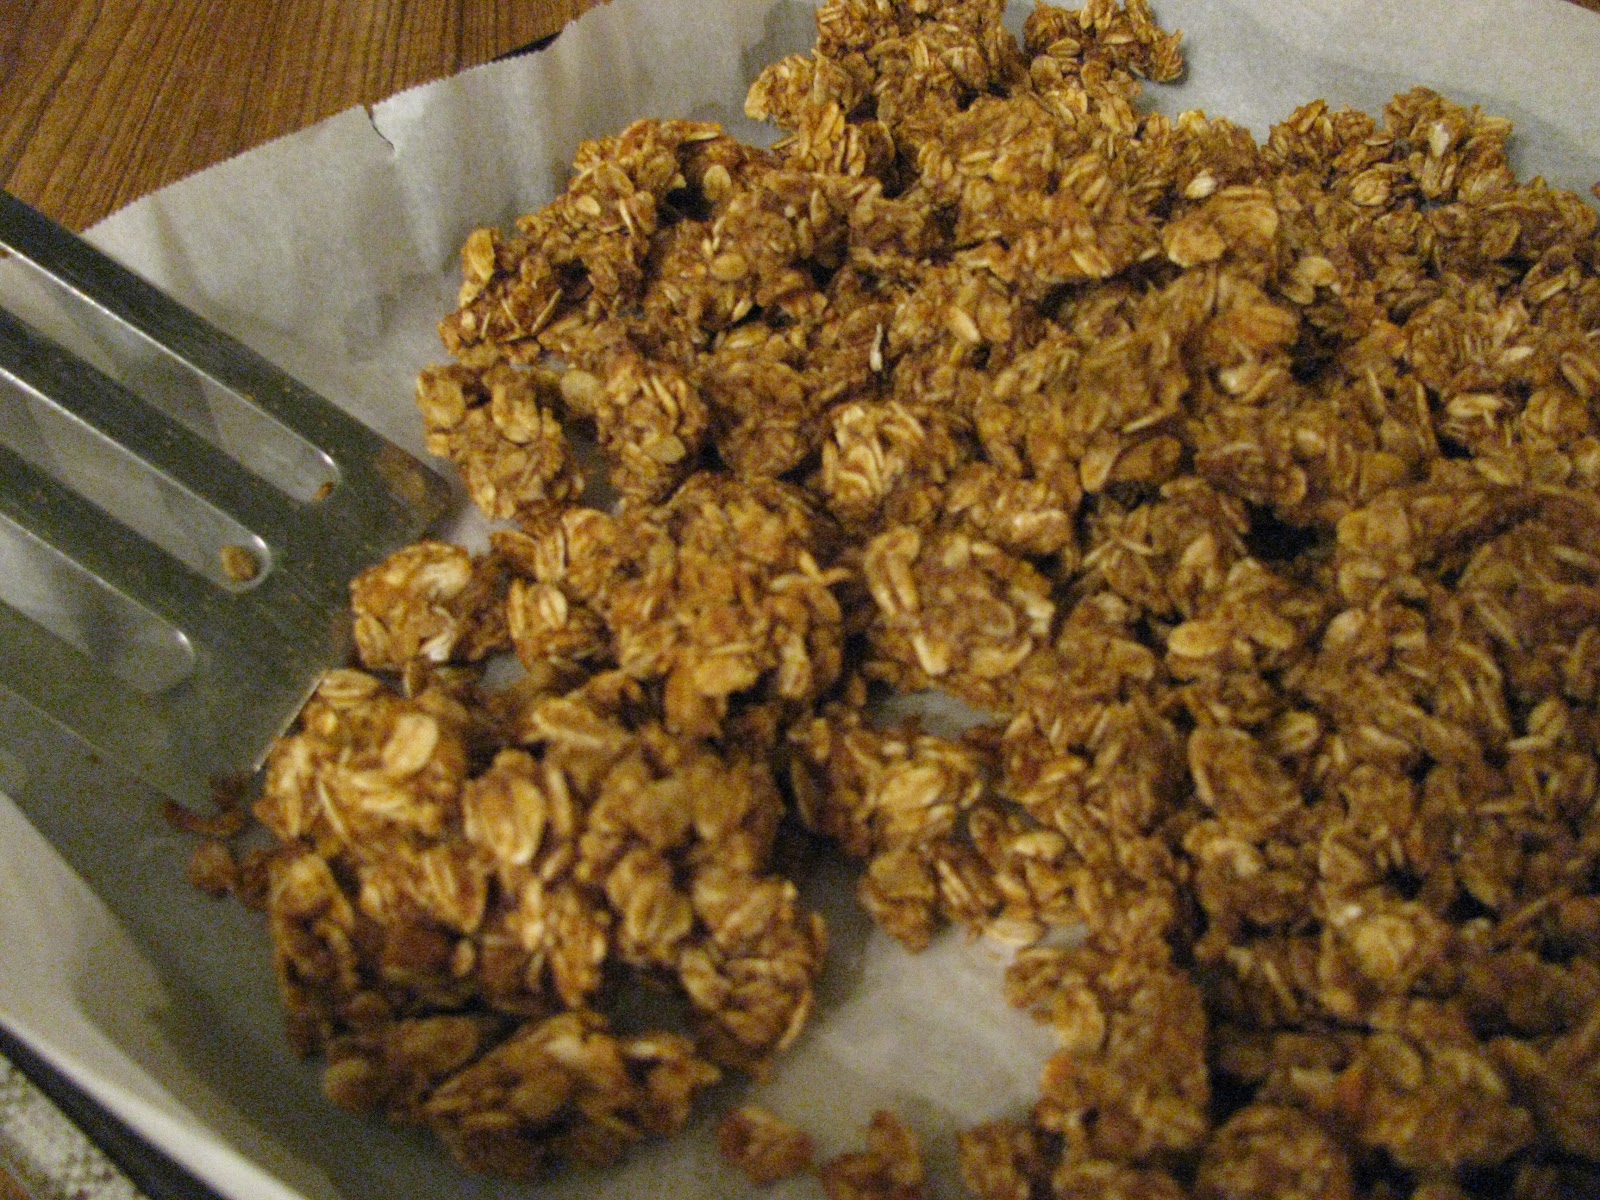
I chose pumpkin pie granola because, well it is October - season of all things pumpkin!! While this was baking the house smelled fabulous! The smell alone brought the kids from all areas of the house. This brings me to the point of loving and hating have non-picky eaters! I made this granola thinking it would be a nice healthy treat for me to top my yogurt with or munch on......well, the kids immediately dove in and then proceeded to ask for yogurt with that "granola stuff" you made on top. *Sigh* - at least someone is eating a healthy snack!! So, I love that they are healthy eaters - I hate that they eat my snacks...... :)
Here is what you need and how you make it!
Pumpkin Pie Granola
5 C. Rolled Oats
1 tsp. Pumpkin Pie Spice
1 tsp. Cinnamon
1/4 tsp. Nutmeg
3/4 C. Brown Sugar
1/2 C. Pumpkin
1/4 C. Applesauce
1/4 C. Syrup (like pancake syrup)
1 tsp. Vanilla
DIRECTIONS: Heat oven to 325. Line a tray with parchment paper - set aside. Combine oats and spices.* Whisk together brown sugar, pumpkin, applesauce, syrup and vanilla. Pour over the oat and spice mixture. Combine thoroughly. Spread onto baking sheet. Bake for 60 minutes - stirring every 20 minutes. Turn oven off and allow to cool in the oven. If you want a "chewier" granola - you can remove the tray and allow to cool on the counter. I like crunchy granola......
* If you don't have pumpkin pie spice you can mix your own by combining -
1/2 tsp. Cinnamon
1/4 tsp. Ginger
1/8 tsp. Nutmeg
1/8 tsp. Allspice
HAPPY EATING!
Tuesday, October 9, 2012
Baked Spasagna!
So this recipe is one from my pinterest addiction! I cannot get enough of the pinterest, it intrigues me - all those creative ideas in one handy place. I mean really, who could ask for more?
Baked Spasanga was pinned from this blog: www.plainchicken.com !

Here is the recipe:
24 oz. Spaghetti, cooked
32 oz. Mozzarella cheese, shredded
8 oz. Ricotta cheese
8 oz. Sour cream
1 1/4 C. Half and Half (I used skim milk and it was fine)
1/2 C. Grated parmesan cheese
1 tsp. Oregano
} I used 2 tsp. Italian Seasoning in place of the oregano and basil
1 tsp. Basil
1/2 tsp. Pepper
1 tsp. Minced garlic
1 tsp. salt
1 jar (26 oz) Spaghetti Sauce
1 lb. Ground beef, browned
DIRECTIONS: Prehea oven to 350. Cook spaghetti according to package directions, drain. In large bowl, stir together sour cream, ricotta, 1/2-1/2, mozzarella, seasoning and 1/4 C. parmesan cheese. Add cooked spaghetti and toss until well coated. Pour spaghetti into a 9x13 pan, that was lightly coated with cookign spray. Top with remaining parmesan cheese. Cover dish with aluminum foil and bake for 30 minutes. While pasta is baking, prepare meat sauce by browning ground beef. Add sauce and simmer until pasta is done. Remove pasta from oven. Cut into squares and top with sauce. Enjoy!
HAPPY EATING!
Saturday, September 22, 2012
Buffalo Ranch Chicken Pasta Salad
Need a side dish for a tailgate, football party or any party for that matter? This tasty little salad wraps the flavor of buffalo wings into a one dish meal. It is best if made a few hours before your gathering and refrigerated for a few hours. It is also very portable...just pack in a cooler with ice packs and make sure to keep it chilled until you are ready to serve!
To make the dressing mix together 1 jar of Ranch Dressing (light dressing can be substituted) and I ended up using about 1/2 the bottle of Frank's Red Hot, you may use more or less, depending on your "hotness" tolerance.

Next, cook a box of pasta and your chicken. (I seasoned chicken tenders with a little salt and pepper).

Once pasta has cooked - rinse in cold water and place in large container or bowl. Dice/shred chicken. Dice celery and red onion.

Top with dressing (I reserved a little of the dressing and added it to the salad before serving; you know - to "freshen" it up) and stir to combine -

Chill for 2 hours and serve.

Buffalo Ranch Chicken Pasta Salad
1 Bottle Ranch Dressing
1 Bottle Franks Red Hot
1 1lb. Boneless, skinless chicken breasts (or tenders)
3 Stalks Celery, washed and diced
1/2 Red onion, peeled and diced
DIRECTIONS: Combine dressing and approx. 1/2 the botttle of Frank's Red Hot Sauce (adjust amount to your taste). Set aside. Cook pasta according to package directions. Rinse in cold water. Cook chicken (season lightly with salt and pepper). I browned my chicken in a skillet - however, I think it would be really good grilled. Dice celery and onion. Place pasta in large bowl/container. Add chicken, celery and onion. Top with dressing and stir to combine. Refrigerate for 2 hours before serving.
HAPPY EATING!
Monday, September 17, 2012
Caramel Apple Dip!

I used to co-facilitate a Mom's group at my kids preschool (it feels like a lifetime ago....). The great lady who facilitated this group with me brought this dip for snack one morning!
This dip is a great fall dip and is very portable, so if you need something quick and easy to take to a party or gathering - this should be your go to dip!
Here is how it goes -
Caramel Apple Dip
1 (8oz) Block of Light Cream Cheese
1 Jar of Caramel Sauce (I used Hershey's)
Toffee Bits or Chopped Heath Bars (I use Heath Bars) - enough to cover the top.
DIRECTIONS: Blend cream cheese and caramel sauce with an electric mixer, until smooth. Spread into a bowl. Top with toffee or heath bar. Chill! Serve with apple slices and graham crackers.
HAPPY EATING!
Sunday, September 9, 2012
BLT Salad Pizza!

This pizza really needs no explanation...my kids had a tough time with the whole "cold" pizza concept but, in the end, they finally understood and gobbled it down!
This recipe is easy and I paired it with broccoli cheese soup for a quick meal!
BLT Salad Pizza
2 pkgs. Crescent Rolls (can use low fat)
1 (8oz) pkg. Cream Cheese (can use light)
1/2 C. Light Ranch Salad Dressing
1 Clove Garlic, minced (I used 1 1/2 tsp. Tastefully Simple Garlic Garlic)
2 C. Iceburg Lettuce, chopped
1 Large Tomato, diced
8 Slice Bacon, cooked crisp
1/2 C. Shredded Cheddar Cheese
Red Onion
Olives
DIRECTIONS: Place crescent rolls on a cookie sheet (do not separate them) and press into the cookie sheet. Bake at 375 for 10 minutes. Remove from oven and allow to cool. Combine cream cheese, garlic and 1/4 C. ranch dressing. Spread on cooled crust. Top with chopped lettuce, tomatoes, cheese, onion and bacon. Drizzle with remaining 1/4 C. ranch dressing. Slice and serve!
HAPPY EATING!
Wednesday, September 5, 2012
Aloha - Hawaiin Chicken!

I think the jury is still out. I enjoyed the dish. Think sweet and sour chicken. JD ate two helpings (no surprise). Jimmy only ate one serving - but said it was good....and well, Riley said she liked the rice.
So, I think that you should try it and let me know what you think. The recipe makes 3-4 servings - but I definitely had leftovers.
Hawaiin Chicken (Freezer/Crockpot)
2-3 Boneless, skinless chicken breasts
1 Can Pineapple Chunks (I think I would recommend pineapple tidbits - the chunks were to big)
1/2 C. White Sugar
1/2 C. Vinegar
3 Garlic Cloves, minced
2 Tablespoons Soy Sauce (I used low sodium)
1/2 C. Pineapple Juice (drained from the can - you can dispose of anything more than 1/2 C.)
DIRECTIONS: Add all ingredients to a gallon size freezer bag. Freeze. Pull from freezer and place in crockpot. Cook on low for 6-8 hours. Shred chicken and serve. I served this with rice and peas. If you are not planning on freezing this - just place chicken in slow cooker and combine remaining ingredients. Pour over chicken and cook as directed above.
Stay tuned - tomorrow is Beef Burritos (crockpot style......).
HAPPY EATING!
Tuesday, September 4, 2012
Dinner Tonight...

Can I just tell you that my kids ate all 5 chicken drumsticks and each had 2 helpings of carrots....go figure!
This is super easy to toss together ~ all you need are the ingredients on the packet.
Herbes de Provence Roasted Chicken and Vegetables
1 pkt. of Seasoning Mix (plus ingredients to make it)
3-5 lbs. Bone-in Chicken (I made the drumsticks for kids and a breast for Jimmy and I)
1 lb. Red Potatoes, cubed
2 C. Baby Carrots
DIRECTIONS: Mix wine (if you don't have wine - chicken broth is a good substitute), olive oil and seasoning packet. Add chicken, potatoes and carrots. Toss to coat. Arrange in a roasting dish and bake at 425 for 45-60 minutes - or until chicken is done.
HAPPY EATING!
Monday, September 3, 2012
Spaghetti Garlic Bread Braid...

Not the most carb friendly recipe - but since I like to be friendly, I made the recipe - I mean really, what is not to love about it?
The recipe got rave reviews from all but one of family members - and she liked the spaghetti, just not the combination of spaghetti and bread together.
Here is how you do it:
1. Take a loaf of frozen bread dough and thaw it to room temp. Roll the dough out to fit your cookie sheet. Slice the dough at 1" intervals. Allow to sit for 15 minutes. While your dough is resting, cook your spaghetti noodles.

2. Add spaghetti noodles, sauce and cheese down the middle of the dough.

3. Braid your dough over your noodles and cheese. Brush the top with egg white and sprinkle with parmesan cheese, parsley flakes and garlic powder. (I used parm cheese and Tastefully Simples Garlic Bread Mix)...

4. Bake at 350 for 35-40 minutes. Slice and serve!

Spaghetti Garlic Bread Braid
6 oz. spaghetti noodles, cooked
1 1/2 Cups of your favorite spaghetti sauce
1/2 lb. Ground Beef, browned
8 oz. Mozzarella Cheese
1 Loaf frozen bread dough (I used Rhodes)
DIRECTIONS: Thaw bread dough to room temprature. Roll dough out into a rectangle. Cut strips into dough in 1" intervals (as shown in the picture above). Place cooked spaghetti, sauce and meat, cheese down the middle of the dough. Braid your dough by criss-crossing strips. Brush with egg white and sprinkle with parmesan cheese, garlic powder and parsley flakes. Bake at 350 for 35-40 minutes!
HAPPY EATING!
Sunday, September 2, 2012
Walking Tacos!
For anyone who does not know what a walking taco is - it is basically a taco inside of a bag of crushed up chips.....very portable and kid friendly! Here are some of the toppings that we included (note: I am the only one who ate pinto beans.....).

Because I wanted to have Fritos - I had to put mine a bowl because the Frito bags are teeny tiny and would not accomodate all of my toppings!

Maybe tonight we will get the chance for a campfire - I found this idea on Pinterest. You stuff a marshmallow with a Rolo! What is not to love about that?
Walking Tacos
1 lb. ground beef
1 pkt. Reduced Sodium Taco Seasoning (I used McCormick)
Single Serving Bags of Doritos or Fritos
Taco toppings of choice
*Brown your ground beef and prepare according to taco seasoning packet directions. Open bag of chips and add a spoonful of taco meat. Add desired toppings. Serve with a fork and eat!
Stay tuned this week! I jumped on the concept of prepping 5 freezer-to-crockpot meals! Yesterday I prepped Hawaiin Chicken, Chicken Fajitas, Teriyaki Pork Chops, Beef Enchilidas and Garlic Honey Chicken and placed them all in the freezer. Now all I have to do is pull them out of the freezer and throw them in the crockpot. This week I will try and feature the recipes and what I served with them!
I am hoping to do some more of this during our Fall season!
Riley and I also made Magic Pumpkin Layer Bars today! They are still in the oven baking and they smell heavenly - so watch for that recipe this week also!
HAPPY EATING!
Monday, July 16, 2012
Hello!
I know. I've been absent since May. I don't know why. Call it summer laziness, call it busy-ness, call it what you want but I can say that my summer is flying! Can you believe it is almost the end of July? I mean really, where does summer go?
My profile to the right says that I am a 30-something mom. I need to change that. At the end of this week, I will be 40! The big 4-0. I am not fretting over it ~ I don't feel forty (okay, maybe my knees ache and I am not as fit as I used to be). I love birthdays - ask my family. They will tell you.
I don't have any recipes today. I know. Boring right? You can tell me! I promise to have some recipes soon! This swim team thing has kept us stepping this summer and now speed & agility camp for football has joined the mix. Not a whole lot of cookin' going on. There is a whole lot of sandwich making and packing our dinners in lunchboxes (maybe I should call them supperboxes).
Oooo, one big thing - I have the best friends ever! They surprised me with a trip to see Savannah, GA. What a fun 4 day weekend! We had the most fun. We watched a chick flick (The Vow....great!!). Shopped til we dropped (great boutiques, specialty shops and restaurants), saw Express Fashions fashion show, ate great food, visited the beach, saw where Paula Deen lives. If you are ever in Savannah, can I recommend the following:
1. Fab'Rik
2. Kayak Kafe'
3. Paris Market
4. Nourish
5. The Salt Table
6. Red Clover
7. One Fish, Two Fish
8. Cherry Picked (high end consignment store - seriously, there was a dress there for a few hundred
dollars, that was the marked down price).
9. Goose Feathers Bakery and Cafe
10. Rocks on the Roof at the Bohemian Hotel
11. Jazzd Tapas Bar
12. Visit Tybee Island
That's all for tonight! Hope you are all having a safe and fun summer!!
HAPPY EATING!
Tuesday, June 5, 2012
Memorial Day and Chicken Ranch Packets!
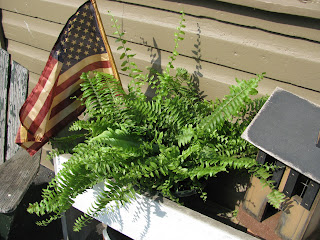
I hope everyone is enjoying their start to summer! This is a whirlwind week for us with school ending, baseball playoffs going on and swim team practice starting! Here are a few shots from the Memorial Day Picnic that we hosted -
Riley created a sign to greet guests:

 Refreshing Meadow Tea!


This recipe is so easy! I found it on Pinterest and have finally gotten around to making it! I imagine you could make these packets and take them camping - you could make them on a fire....maybe, I am not much of a camper - I like the concept of a campfire and smores and cool, crisp weather. I do not like bugs, spiders and ticks.....all that said, I don't know if this would work for camping, but if you camp, try it and tell me if it worked!
You will need this ( I think it is funny that Weis markets the chicken by labeling it "skinny" chicken - I mean, what is a skinny chicken??) -


Riley created a sign to greet guests:


Food table centerpiece!


This recipe is so easy! I found it on Pinterest and have finally gotten around to making it! I imagine you could make these packets and take them camping - you could make them on a fire....maybe, I am not much of a camper - I like the concept of a campfire and smores and cool, crisp weather. I do not like bugs, spiders and ticks.....all that said, I don't know if this would work for camping, but if you camp, try it and tell me if it worked!
You will need this ( I think it is funny that Weis markets the chicken by labeling it "skinny" chicken - I mean, what is a skinny chicken??) -

Here is what you will do with it -

Chicken Ranch Packets:
4 Boneless, Skinless Chicken Breasts
4 Slices Bacon, cooked crisp
1 Cup Shredded Cheese
4 Cups Broccoli
1 Box Chicken Flavored Stuffing
1 1/4 Cup Water
4 Tbsp Ranch Dressing
4 Large Sheets of Foil
DIRECTIONS: Preheat oven to 400 degrees. Mix stuffing and water - set aside. Spray sheets of foil with cooking spray and place 1/4 Cup stuffing mix in the center of each sheet of foil. Top with a chicken breast. Place 1 cup of broccoli on top of each chicken. Next sprinkle each packet with 1/4 C. cheese and crumble one slice of bacon over the top. Drizzle 1 Tbsp. of ranch dressing over each packet. Bring sides of foil up and fold over - wrap up sides. Make sure to not fold down tight against the chicken - you want to make sure air can circulate for even cooking. Place on a cookie sheet and bake for 45 minutes. Remove from oven and allow to sit for 5 minutes. Cut small slits in the foil so steam can escape. Remove from foil and place on plate!
Sorry I don't have any "after" pictures! The whole family loved it! Jimmy even said it was really, really good - like "that hit the spot" good! Guess I will keep it on the radar for meals in the future!!
HAPPY EATING!
Tuesday, May 22, 2012
3rd Grade Book Reports and a little PTO Appreciation!

I cannot believe this school year has gone by.....I feel like each year goes by a little quicker so I am trying to embrace the time that my kids still want me to participate in their school activities! JD has had 4 book reports this year - I was thankful for them because he is not my reader and would rather be doing a multitude of different things before actually sitting still and reading. These books have made him take the time to read! The most recent one was a mystery and a "penguin pendant" went missing! Sooooo, because we had to make a puppet (no, I don't sew - he made a finger puppet out of construction paper) - I figured it would be fun to provide a little treat to go along with his book report for the class! All I did was bake the cupcakes - JD did the rest! Here is how we did it:
Start by making sure you have clean hands!!

Set up your work area with your supplies:

Start working on your cupcakes:

I used a basic vanilla cake mix (boxed) and a buttercream icing. The head and wings were made out of the Keebler Mint Cookies (you know, the ones the copied off the Girls Scouts...), Mini Chocolate Chips and dried mango slices for the feet and beak!
With the school year wrapping up - so is PTO! The other officers and I took the opportunity last Thursday to thank some of the chair people and reliable volunteers that we have had the honor to work with!! Here is a little of what we served:
A little "thank you" for them to take home~

So YUMMY! A create your own fruit pizza!

Caprese Bites! (with a Sweet Balsamic Dipping Sauce)

Chicken Cesar Salad Sliders!

Hope everyone has a great end to their school year!!
HAPPY EATING!
Monday, May 7, 2012
Seis de Mayo!

We celebrated Cinco de Mayo a day late! Not because we are procrastinators or because we were running behind schedule - but because we had a sick girl! Sick kids = postponing plans. That's how it goes sometimes! We still had an enjoyable evening on the porch with great friends and great food!
Jimmy grilled the best chicken that we used for our grilled chicken tacos! Mmmmm, my mouth waters just thinking about it!


Grilled Chicken Tacos
1/2 C. Mayo (I used Hellman's Light)
3 Tbsp. Fresh Lime Juice
1 pkt. Taco Seasoning (I used Taco Bell)
6 Boneless, Skinless Chicken Breasts - pounded flat
DIRECTIONS: Combine mayo, lime juice and taco seasoning. Heat grill to medium heat and place chicken on grill. Cook approx. 6 minutes and turn - baste chicken once turned. Cook another 6 minutes and flip again. Baste other side of chicken. Continue cooking and basting until chicken juices run clear and chicken is cooked. Remove from heat, thinly slice and serve with taco sides.
HAPPY EATING!
Wednesday, May 2, 2012
Bubble Gum Cupcakes!

I found these here...cookiesandcups.com/blow-pop-cupcakes. (If this link doesn't work, you can access Cookie and Cups by clicking the link on the right side of my screen). I made them for the Bingo/Bake Sale night at our school! The icing tastes just like Bubble Gum! Like the blogger at Cookies and Cups, I made my own Buttercream frosting!! Here is the recipe I used:
Bubble Gum Buttercream
1/2 C. Crisco Vegetable Shortening
1/2 C. Butter, softened
3-4 C. Confectioners Sugar
1 Tbsp. Vanilla
3 Tbsp. Milk
1 Packet of Duncan Hines Bubble Gum Mix In Flavoring (for icing)
Combine Crisco and Butter until combined. Add sugar - starting on low speed until combined and then to medium speed. Add vanilla and milk and mix on high speed for several minutes, until light and fluffy. Add flavor packet and mix on high speed for another minute or so; until well incorporated.
HAPPY EATING!
Chicken "Fried Rice"...

Who would have thought that chopped up cauliflower would taste like fried rice? Really, I am not kidding, you have to believe me! I didn't believe it when I saw it, but I believe it now. I found this recipe on Pinterest and made a few adaptions to use what I had on hand!
Process cauliflower until it resembles the size of rice...

Who would have guessed...fried rice!

Go ahead, give it a try - it is easy!
CHICKEN FRIED RICE
1 lb. Ground Chicken
1 Large Head of Broccoli, cut into bite size pieces
1/2 Bag of Frozen Peas and Carrots
1/4 Cup Chopped Onion
3 Eggs
Lite Asian Sesame Dressing (Ken's is my favorite choice)
DIRECTIONS: Place chicken in a bowl and drizzle approx. 1/4 C. dressing. Sit at room temp. for 30 minutes. Place 1/2 of cauliflower in a food processor. Pulse about 15 times; until cauliflower resembles size of rice (see picture above). Process the other 1/2 of the cauliflower. Heat large skillet over medium heat for 2 minutes. Coat with cooking spray and brown ground chicken. Cook until no longer pink. Remove from pan. Add cauliflower and 1/2 C. dressing. Toss in pan until coated with dressing and hot. Make a well in center of cauliflower and add eggs-scramble and then toss with cauliflower. Add peas, carrots and onion. Cook until veggies are tender. Add chicken and toss until dish is heated through. Enjoy!!
HAPPY EATING!
Thursday, April 19, 2012
Crock Pot Chicken Azteca!

I needed something quick and easy. Wednesdays are typically a busier day because of work and helping in Riley's class in the afternoon, I don't get home to start prepping a meal - that equals leftovers or crockpot cookery!
Crock pot cookery it was for us this week! This recipe is so super easy you won't believe it! Here goes...
Chicken Azteca - Serves 6
1 15oz. Can Black Beans - drained
2 Cups Frozen Corn
1 Garlic Clove, minced (I used 1 Tbsp. of Tastefully Simple's Garlic Garlic)
1/2 tsp. Cumin
1 Cup Salsa (Kirkland Brand Organic)
3 Boneless, Skinless Chicken Breasts (frozen)
1 8 oz. Pkg. Low Fat Cream Cheese
Shredded Cheddar Cheese
Black Olives
Cooked Rice
DIRECTIONS: Place beans, garlic, corn cumin and 1/2 the salsa on the bottom of the crock pot. Place frozen chicken breasts over the top. Pour remaining salsa over the chicken. Cover and cook on low for 8-10 hours. (If your chicken is thawed - you only need to cook for 4-6 hours). After cooking time is up, remove chicken and cut or shred into small pieces. Return to the crock pot. Stir in cream cheese. Cook on high until the cream cheese melts (maybe 10 minutes). Spoon your chicken mixture over the rice and tope with shredded cheese, black olives, sour cream - really any topping you would like!
HAPPY EATING!
Subscribe to:
Posts (Atom)